Mandolin . . .
Patrick walked in this morning carrying a mandolin – we thought that ‘stealthman’ had made it overnight! However, it was a very expensive gift from his girlfriend who paid £10 for it in an ‘op shop’. It certainly is not a finely hand crafted instrument made from fine woods using the techniques expected of candidates for Associate Membership to the Ancient Order of Luthiers – and when our invigilator Nick saw it he said she might have paid too much . . . and that Patrick’s candidature for the Order may also be in jeopardy for even agreeing to accept such an instrument! See, you can make a career limiting move anywhere around here – especially for an instrument that he cannot even play!
 |
| Nick says £10 was too much! |
Getting Started . . .
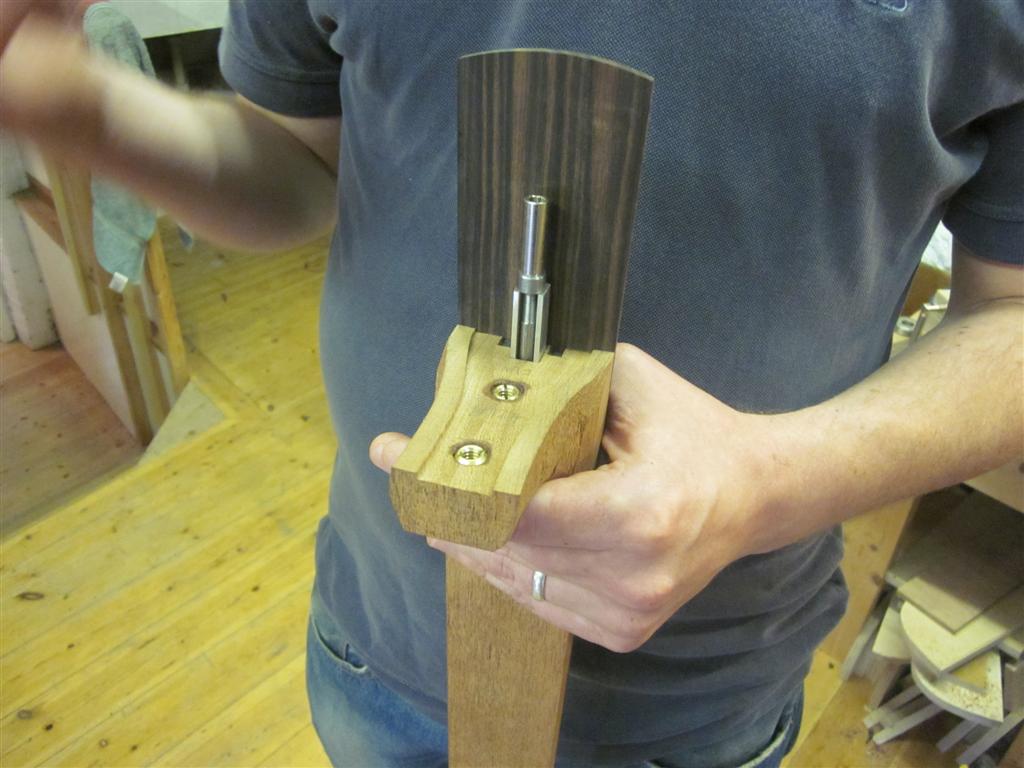
The main objective of today is to get our fingerboards glued and clamped onto our necks – so the first job was to prepare a neat wooden surface over the truss rod (the adjustable aluminium rod that runs down the neck of the guitar). This involved manufacturing a little end block to go in front of the truss rod and glue it into position . . . and then plane it flat with the neck and headstock.
Next the carbon graphite rods (for extra torsion strength) are cut to size and inserted using a special and nasty two-part epoxy resin – taking care to ensure they are seated all the way down – and two little end blocks inserted. The truss rod is also glued into place using the comparatively simple Titebond.
Once everything is bedded down little strips of mahogany (same wood as the neck) are glued into the slots on top of the various rods, the whole lot is planed down to a uniform height and then clamped in place very tightly.
 |
| End block going into place |
 |
| This will be gone forever soon |
 |
| Getting it all neat |
 |
| They've taken over my bench! |
 |
| All the bits to be glued on |
 |
| Plane the lot down to an even level |
 |
| Glued and clamped down |
Today’s Technical Topic . . .
Nick came into our workshop right on cue for our coffee and pastries . . . in fact he volunteered to go and collect some of the goodies. Today’s topic related to neck joints – it turns out that Nick and Richard do their joints similarly but differently. Apart from using a different bolting mechanism, Nick leaves a routed section down the middle of the joint whereas Richard keeps that entire compound curving surface complete. There are merits in both approaches – but I really think it is what they have become comfortable doing.
 |
| Nick's neck joint |
 |
| A beautiful fretboard |
 |
| You turn it on by plugging it into the lamp |
Headstock Design . . .
There are only a few areas where a builder (we are not allowed to use the word luthier until admitted!) can realistically create their own look with their guitars . . . and the shape of the headstock is probably the most obvious one. For example, those of us who play guitars can instantly recognise the shape of a Fender headstock without even having a second look. So now is the time we need to come up with our own ‘unique’ headstocks! Drawing a cool looking shape is pretty easy . . . but the hard part is the peg and string geometry. As can be seen from one of Richard’s guitars below, the strings need to run through the nut (the white block – of cow’s shin bone interestingly enough) to the relevant tuning peg WITHOUT touching another string.
If we were all sensible we would design and build head stocks that are narrower at the far end . . . but that just doesn’t look like rock ‘n' roll! Anyway, with these principles of design and geometry in mind we all set out to create our own masterpieces . . . starting with some outline sketches of ideas stolen from other guitar makers!
 |
| The geometry is the hard part |
 |
| Understanding the principles |
 |
| Nice design - if we could see it! |
 |
| Prototype 1 |
 |
| Closer to the final design |
 |
| Surely a sign from heaven - Richard's pencil landed tip down and just stood there! |
Another Satisfied Customer . . .
Richard has a loyal group of customers who only come to him to set up and repair their guitars – this man regularly travels from Chichester to get his work done . . . in this case one of his three beautiful Collings guitars (!). It seems Richard has the knack of interpreting his customers’ needs and requirements and translating that to the set up of the guitar, which is a great skill. So the customer went away satisfied once again.
 |
| Another satisfied customer |
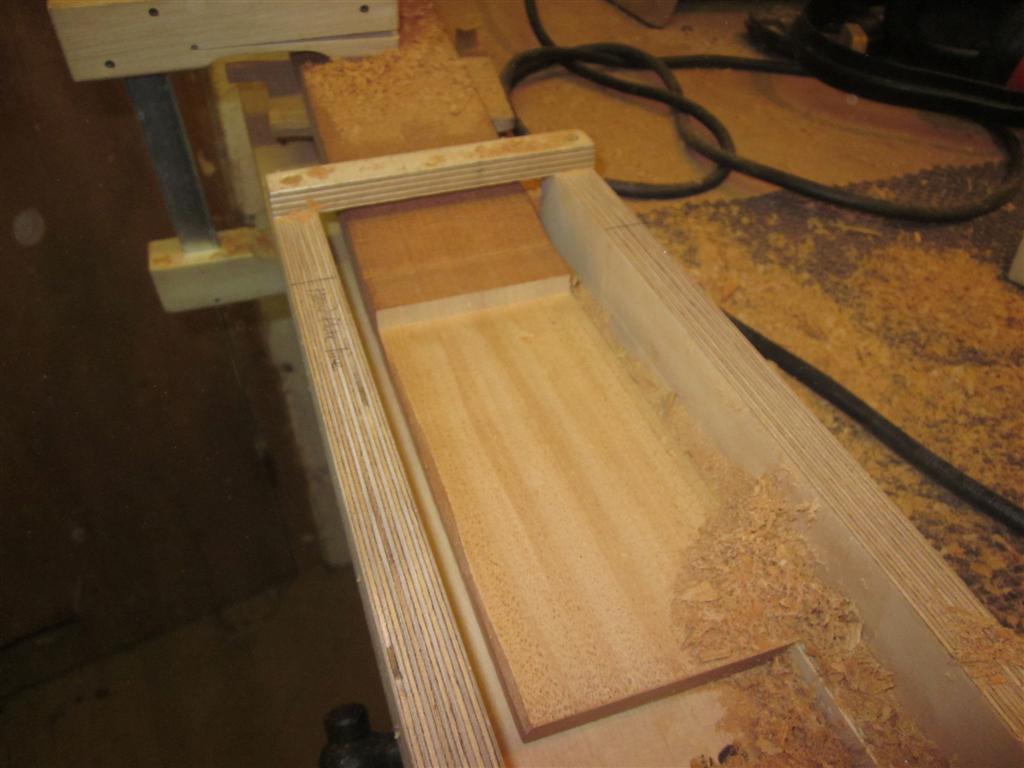
More Routing . . .
The next job involved routing the back of the headstock down to the finished height of about 13mm. This task is relatively simple and there is a jig made for the task . . . so once everything was properly and securely clamped in place the router is moved over the wood in a ‘mowing the lawn’ manner – another of Richard’s favourite sayings.
 |
| Routing the headstock |
 |
| The 'mowed lawn' |
 |
| The finished article |
 |
| Coming together |
My Bling Revealed . . .
It was time for me to rout my ‘logo’ onto the ebony headstock face-plate. This was a much simpler task than I thought it would be . . . locate the logo in the correct position, draw around it with a super sharp chinagraph pencil and rout out the black bits. Of course it took quite a few passes to get it so the mother of pearl icon would easily slot into place, but in essence it is a relatively easy job. The gaps are then filled with ‘ebony dust’ and covered with super glue (three or four times) and finally the whole thing is zapped with super glue setter and left for a while – and then put through the thicknesser to reveal the handiwork. Next I inserted the little white dot by simply drilling a hole and super gluing it into place and sanding it all down. I am very pleased – simple and respecting Richard’s ‘O’. Once all the excitement in the workshop had subdued, I sanded the front of the face plate very smooth with 120 and then 180 grit sandpaper and then thicknessed the whole thing down to 2.0mm from the back.
 |
| That's about right |
 |
| Draw around the edges |
 |
| Focus on the black bits |
 |
| Rout them out |
 |
| Ebony dust and super glue |
 |
| Clean it all up |
 |
| I will make this smaller later |
 |
| Insert the dot |
 |
| And that's it in the playing position |
Cutting the Frets . . .
Now we are starting to get to the serious end of making music . . . cutting out our frets. This is a surprisingly easy thing to do . . . get the roll of fret wire off the wall, lay it the correct way in the fret and cut it with the snippers. This is my kind of job!
 |
| Cutting the frets |
 |
| All done |
Glueing on the Fretboard
It is now time to say goodbye to the truss rod and other innards of the neck forever . . . the fretboard is about to go on. As with all tasks associated with guitar making, it is important to use the right amount of glue for the job . . . too much and the bits move all over the place and too little and it won’t stick. I will get it right one day – soon! This is especially important in the case of the fretboard as it cannot be allowed to move one mm . . . so great care has to be taken to ensure it remains exactly in the right place as the clamps go down. It is relatively easy to pick the really important jobs as Richard is always hovering nearby – thankfully!
 |
| Too much or too little - we'll soon find out |
 |
| Clamping into place |
 |
| Clamped down tight |
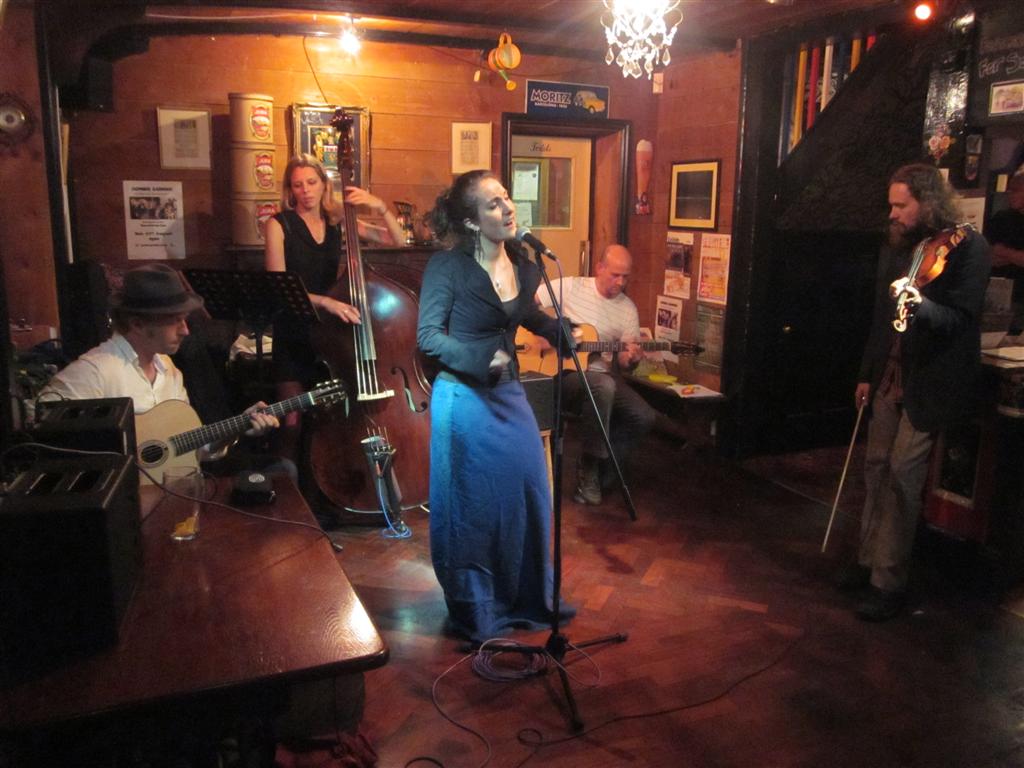
This evening marked a very important step in our research project about the pubs and ales of Lewes. We are very keen to ensure our methodology is sound and that the results will not only be valid but reliable. So we asked our supervisor Suzi to accompany us to the Snowdrop. I have to say that the results were instantaneous and remarkable . . . not only did we quickly drink one of the local ales dry we also spoke with some locals (the people who Phil is staying with) and found a table in direct line of vision of the band. Suzi can come along anytime!
And it was gypsy jazz night at the Snowdrop . . . what a phenomenal guitarist! Jerome is a local luthier who specialises in gypsy jazz guitars (and who is also the neighbour of Phil’s Lewes landlord) and he put on a dazzling display of finger work. He and the bass player were far too good for that audience. We intend going to his workshop – when we can find it! And it has to be said that the bass player was also a very fine musician and she really got into the swing of the music . . . see I didn’t make a sexist comment about how good she looks!
 |
| Nice guitars! |


No comments:
Post a Comment